
Moving an SSL certificate from one Windows server to another is possible by exporting a PFX file from one server the certificate is installed already on, and importing it to another server. Creating a PFX file is the only way to transfer the certificate with the corresponding private key from a Windows server. Besides the certificate and the private key, a PFX file may contain the intermediate certificates as well. Altogether, this makes PFX a unified password-protected container to exchange certificate information (public and private keys) in a single file.
Exporting a certificate from a Windows server can be done either in Microsoft Management Console (MMC) or via IIS Manager if the certificate was already installed.
Export using MMC
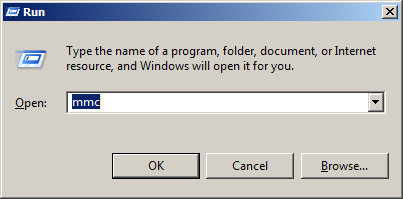
- Press Win+R, type in mmc and click OK to open Microsoft Management console:
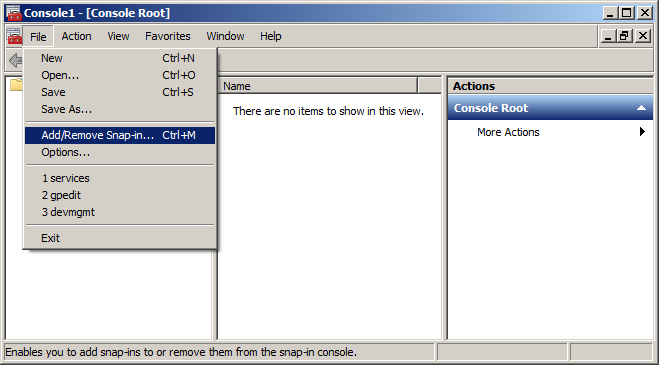
- Click File in the Menu Bar and then select Add/Remove Snap-in:
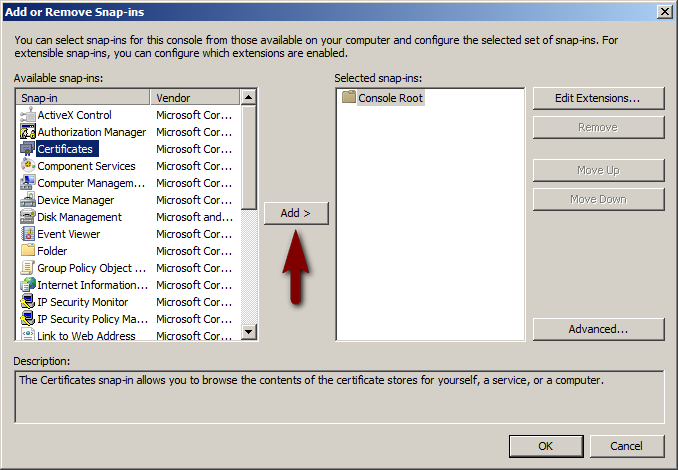
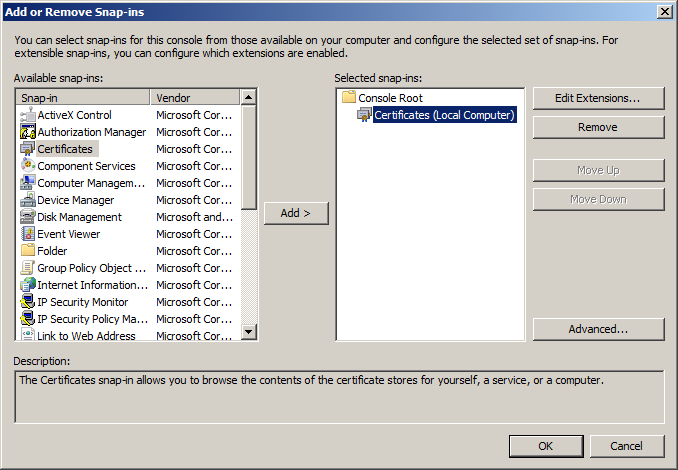
- Select Certificates from the 'Available snap-ins' field and click Add:
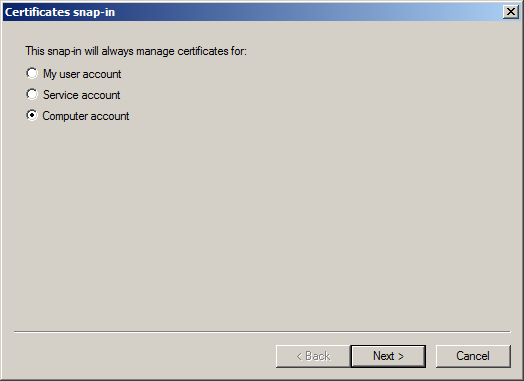
- Choose Computer account:
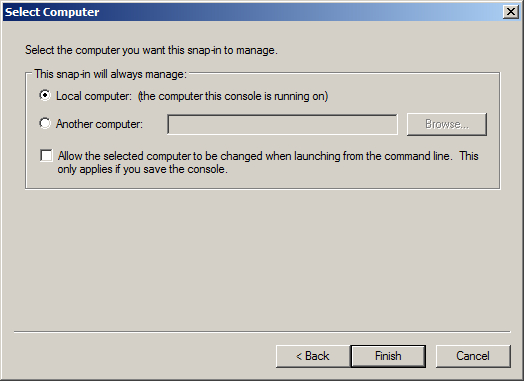
- Select Local Computer to manage the snap-in.
Note: to see the certificates in the local computer store, you should be logged in as Administrator.
- Click OK to add the selected snap-in to console window:
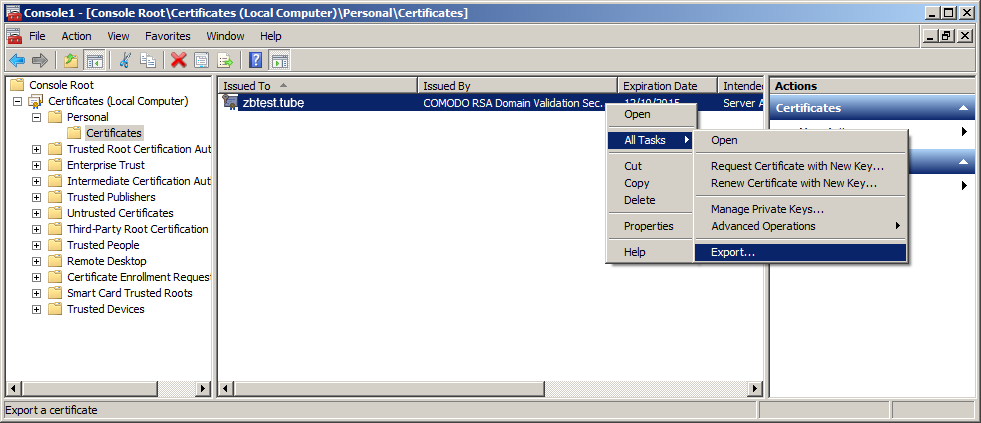
- Go to the Personal > Certificates store, right-click on your certificate that should be exported, and select All Tasks > Export:
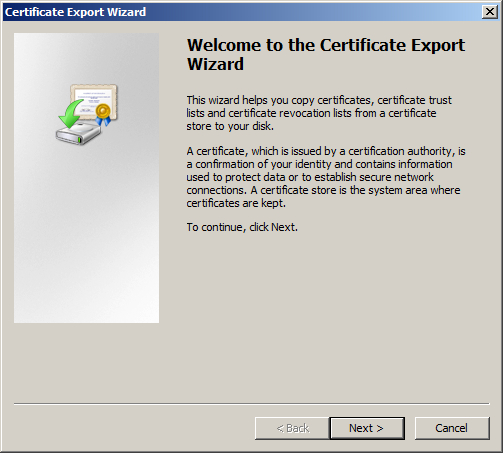
- When Certificate Export Wizard opens, click Next to proceed further:
- When prompted, select the radio button 'Yes, export the private key' and press Next:
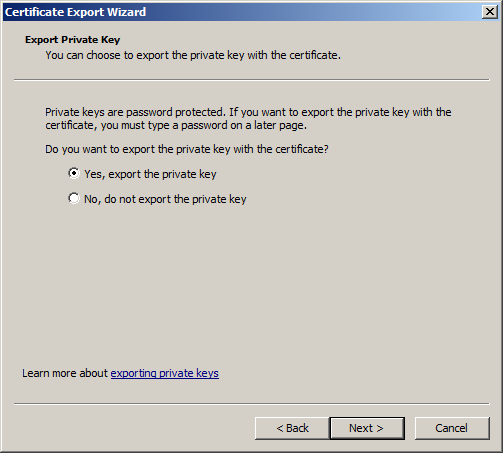
If the 'Export the private key' is not clickable, the private key for the certificate is not exportable or is absent on the machine, and you will not be able to export a PFX file. You will need to generate a new CSR code with an exportable private key and reissue your certificate to be able to export a certificate.
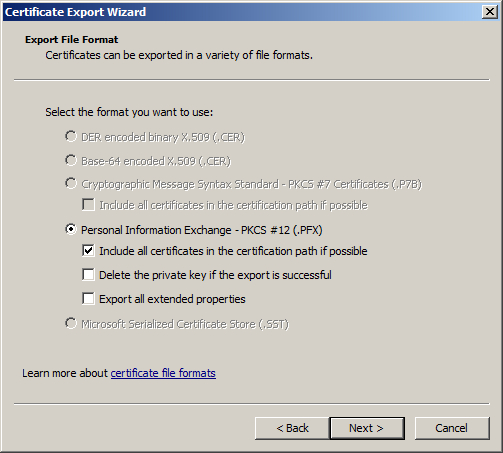
- In the Export File Format dialogue window select Personal Information Exchange - PKCS #12 (.PFX) as the format you want to use. You may also check the Include all certificates in the certification path if possible option to place all intermediate certificates into the PFX file. Once done, click Next:
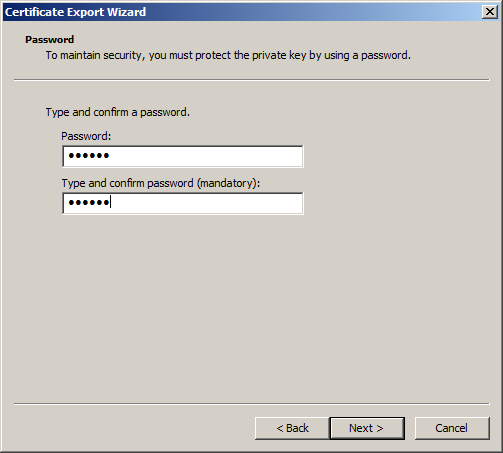
- Specify the password for the PFX file and click Next.
This password is very important. Please remember it; this password will be required when importing a PFX file on a new server.
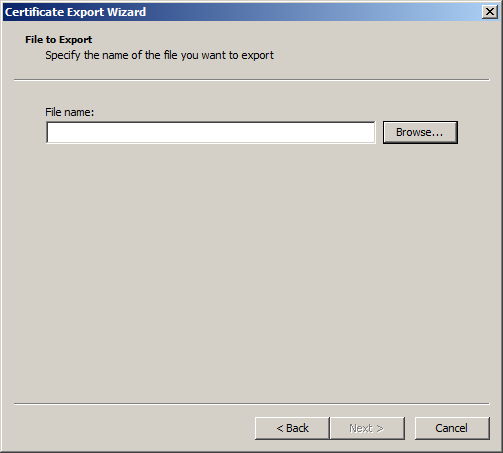
- Specify location and name of the file where PFX will be exported. Click Next:
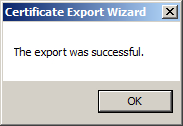
- To complete the wizard, click the Finish button. The certificate along with the private key have been successfully exported to the PFX file:
Export using IIS.
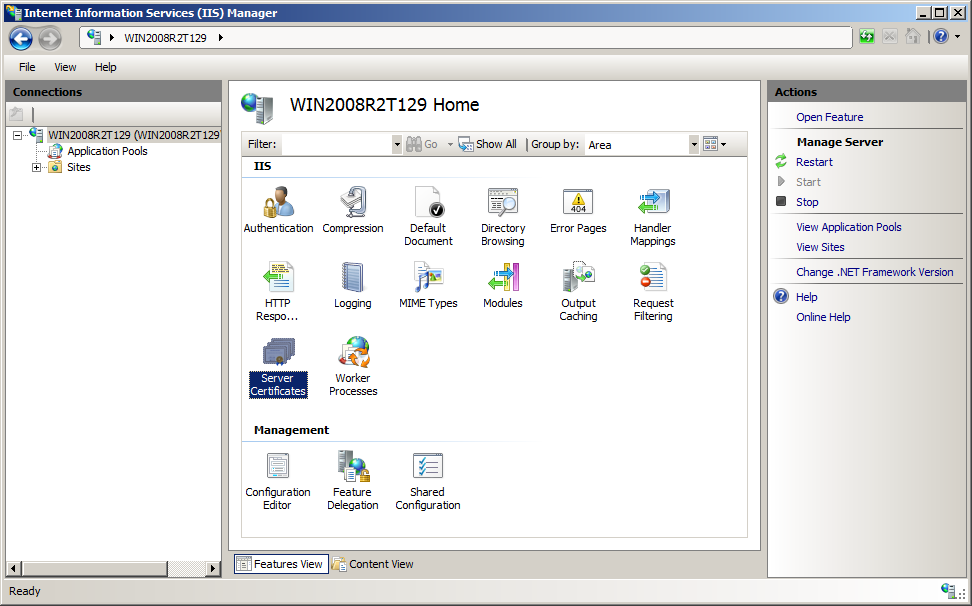
- Go to Start > Administrative Tools > Internet Information Services (IIS) Manager.
- Select the server on which the certificate is installed.
- Choose the 'Server Certificates' option in the center menu:
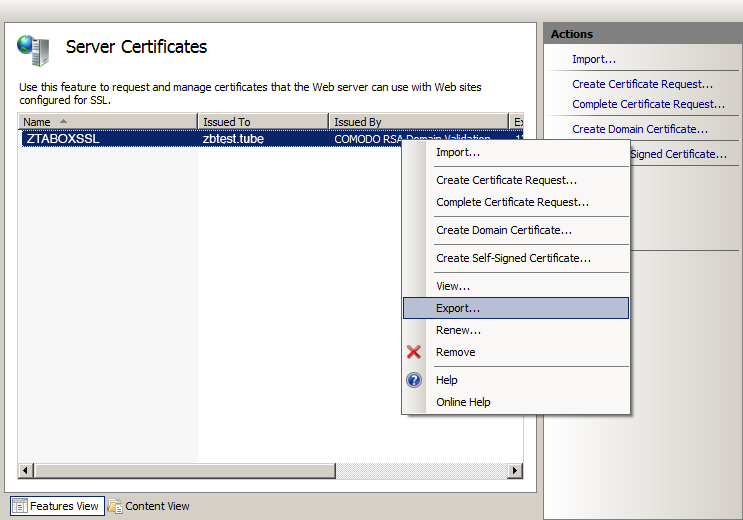
- Right-click on the needed certificate and select Export.
Only the certificates associated with the private keys are shown in the list of server certificates in IIS Manager.
- Specify the filename, location, PFX export password and click OK:
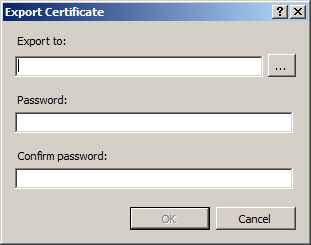
A PFX file was exported and can be found in the specified location.
The certificate import on a new server can be also performed using either Microsoft Management Console or IIS Manager.
Import using MMC.
- Add Certificates (Local Computer) snap-in to MMC following the steps described above.
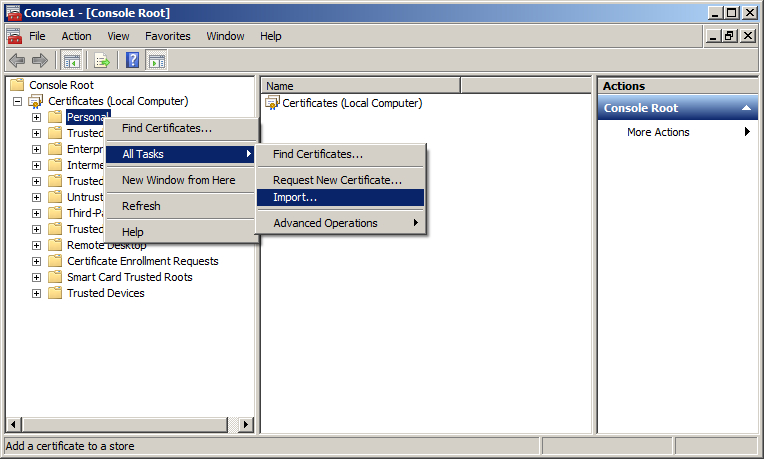
- Once added, right-click on the Personal store > All Tasks > Import:
- The Certificate Import Wizard will be launched, press Next:

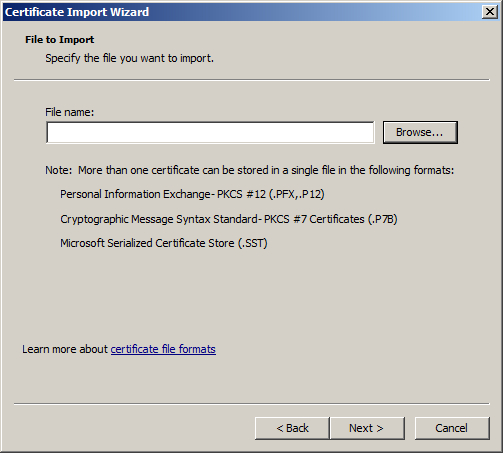
- Using the Browse button choose the .pfx file which you want to import on your server, press Next:
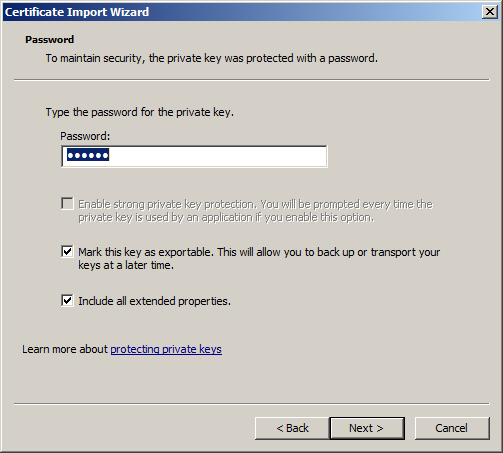
- Enter the PFX file password. It was specified during creation of the .pfx file.
You may select Mark this key as exportable to have an opportunity to export the certificate with the private key from this server later. Then click Next:
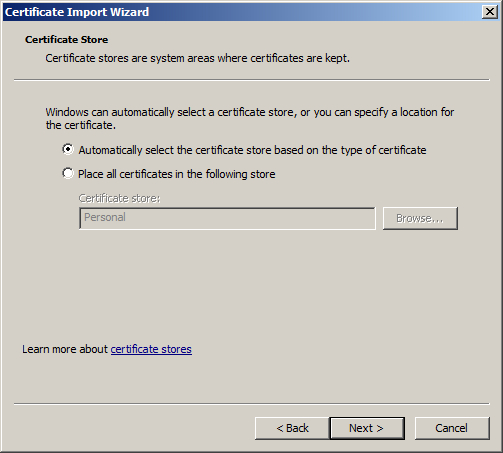
- In the next dialogue window choose Automatically select the certificate store based on the type of certificate. This will allow MMC to place the certificates from the .pfx file to the corresponding folders if the file also contains intermediate certificates. Click Next:
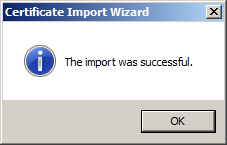
- Click Finish. The certificate has been imported to the server and can be now assigned to the website:
Import PFX using IIS Manager
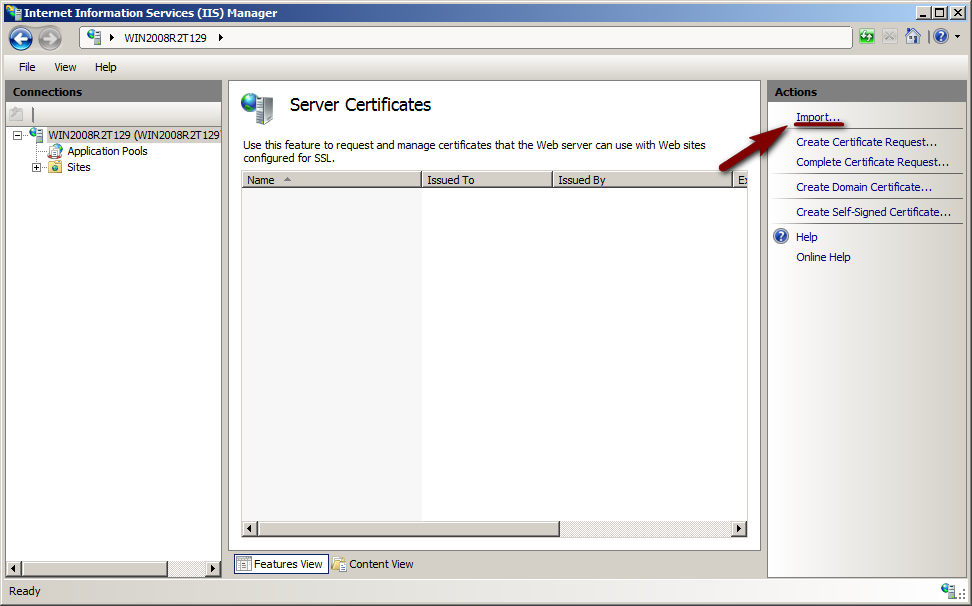
- Launch Internet Information Services Manager (Start > Administrative Tools > Internet Information Services (IIS) Manager), and choose the server the certificate should be imported on.
- Double-click 'Server Certificates' in the center menu.
- Click the Import button in the right-side menu:
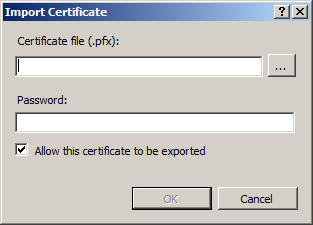
- Locate the PFX file on your machine and specify the password that was used when exporting the certificate. Optionally, you may check Allow this certificate to be exported. Then, click OK:
Assigning a certificate for a website.
Once the certificate was imported by any of the methods described above, it will be shown in the list of server certificates in IIS Manager and can be assigned to existing website using IIS.
You can check more information on how to bind the certificate to a website in IIS in this installation guide.