
要為Google App Engine安裝SSL證書,必須滿足以下要求:
- 擁有一個註冊的域名,將用於網絡應用程序;
- 將域名指向您的App Engine網絡應用程序。相關說明可以在Google的'為您的應用程序添加自定義域'部分找到;
- 從證書授權機構獲取SSL證書文件;
- 找到在CSR生成過程中創建的私鑰。
一旦通過電子郵件收到包含證書文件的ZIP存檔,您可以依照以下步驟進行安裝:
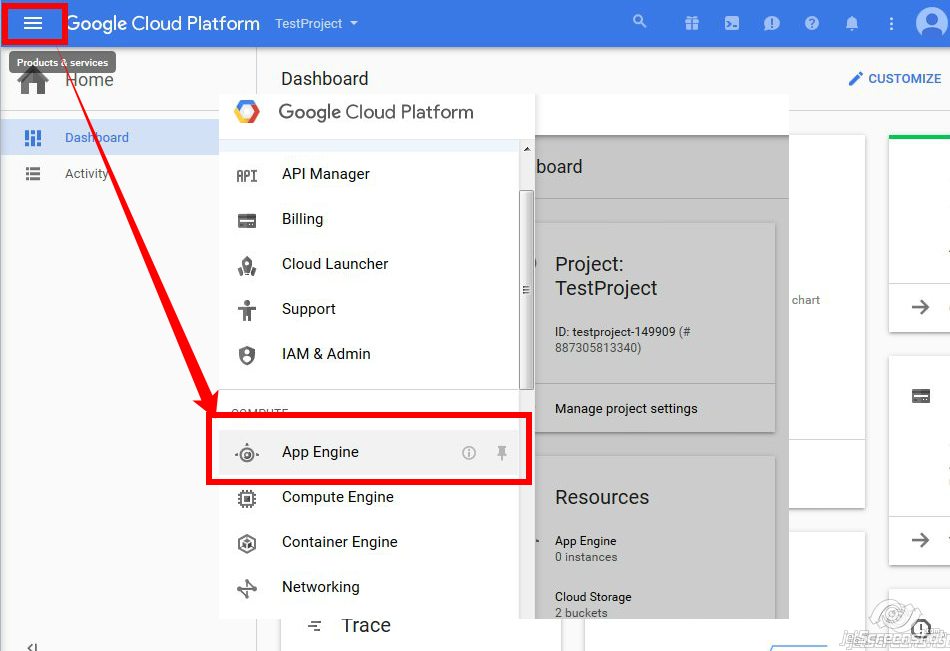
- 登錄您的Google Cloud帳戶,網址為https://cloud.google.com
- 找到產品與服務 > App Engine:
- 在App Engine菜單中,轉到設置 > SSL證書:
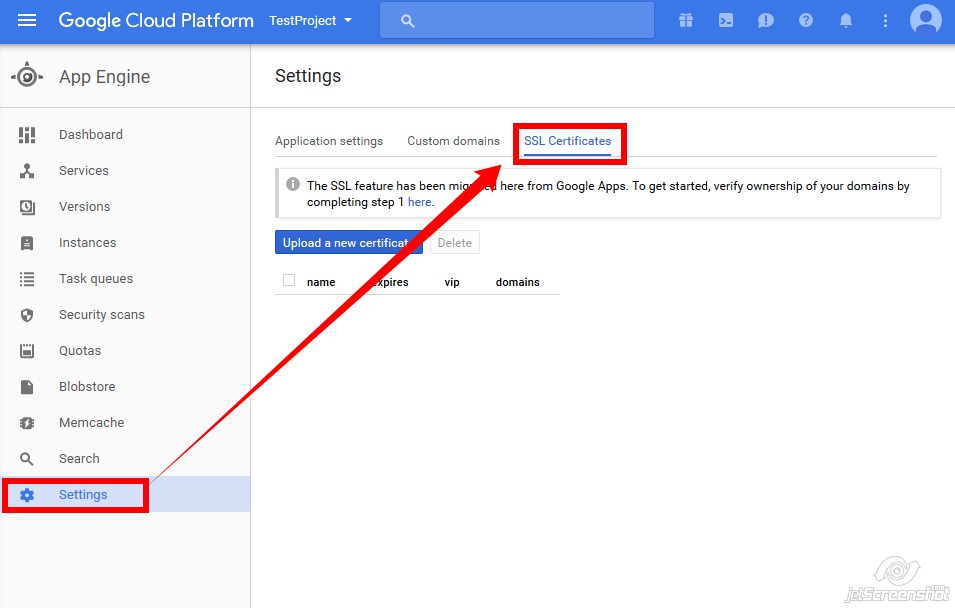
- 在 'SSL證書' 屏幕上,按 '上傳新證書' 按鈕 - 您將看到 '添加新SSL證書' 窗口:
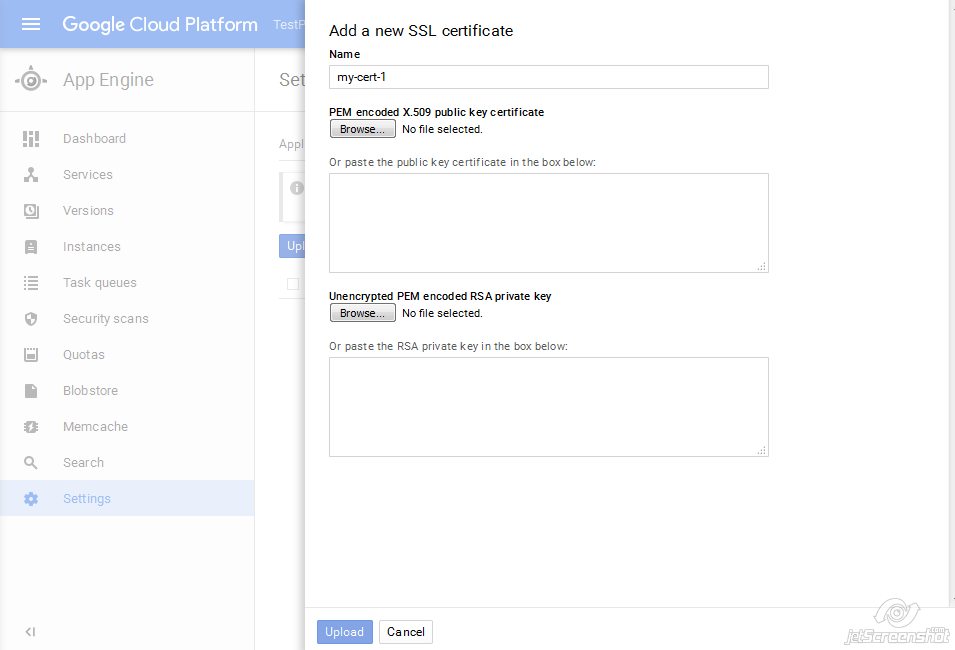
在這一步,必須找到證書文件和私鑰代碼,這些是在CSR中生成的。
有兩種方法可以進行操作:複製/粘貼代碼或上傳包含代碼的文件。我們將在下面描述這兩種方法。
文件上傳。
在上傳之前,需要準備文件。證書文件 (yourdomain.crt) 應與相應的CA捆綁文件(即包含中間和根證書的 yourdomain.ca-bundle 文件)串接(合併)。這可以通過在 yourdomain.crt 文件中的證書代碼下方插入yourdomain.ca-bundle的內容來完成。只需將整個CA捆綁文件的代碼粘貼到 yourdomain.crt 文件中的-----END CERTIFICATE-----標籤之後。生成的文件應如下所示:
-----BEGIN CERTIFICATE-----
...(yourdomain.crt代碼在這裡)
-----END CERTIFICATE-----
-----BEGIN CERTIFICATE-----
...(中間證書代碼)
-----END CERTIFICATE-----
-----BEGIN CERTIFICATE-----
...(額外中間證書代碼)
-----END CERTIFICATE-----
證書文件現在已準備好上傳。還需做一步,即將您的私鑰代碼(從-----BEGIN RSA PRIVATE KEY-----到-----END RSA PRIVATE KEY-----)保存到TXT文件中(例如,可以命名為mykey.txt)。當您擁有兩個文件,即合併的yourdomain.crt和mykey.txt時,點擊 '瀏覽' 按鈕並相應上傳。
注意: 如果您收到 "您選擇的私鑰似乎無效" 的錯誤,您擁有的私鑰可能在-----BEGIN RSA PRIVATE KEY-----和-----END RSA PRIVATE KEY-----標籤中缺少'RSA'關鍵字。只需將'RSA'添加到您的-----BEGIN PRIVATE KEY-----和-----END PRIVATE KEY-----標籤中即可。
複製/粘貼代碼。
證書/私鑰代碼可以直接粘貼到相應框中。但是, 'PEM編碼的X.509公鑰證書'字段應填入完整的證書鏈:您的域名證書、中間和根證書。應首先粘貼yourdomain.crt的代碼,然後將yourdomain.ca-bundle文件中的代碼粘貼到同一框中。您擁有的私鑰代碼應粘貼到'未加密的PEM編碼RSA私鑰'框中。
當證書和私鑰到位後,點擊 '上傳' 按鈕以完成安裝。您將看到包含SSL安裝詳細信息的頁面。需要在'為以下自定義域啟用SSL'下選擇您希望保護的域:
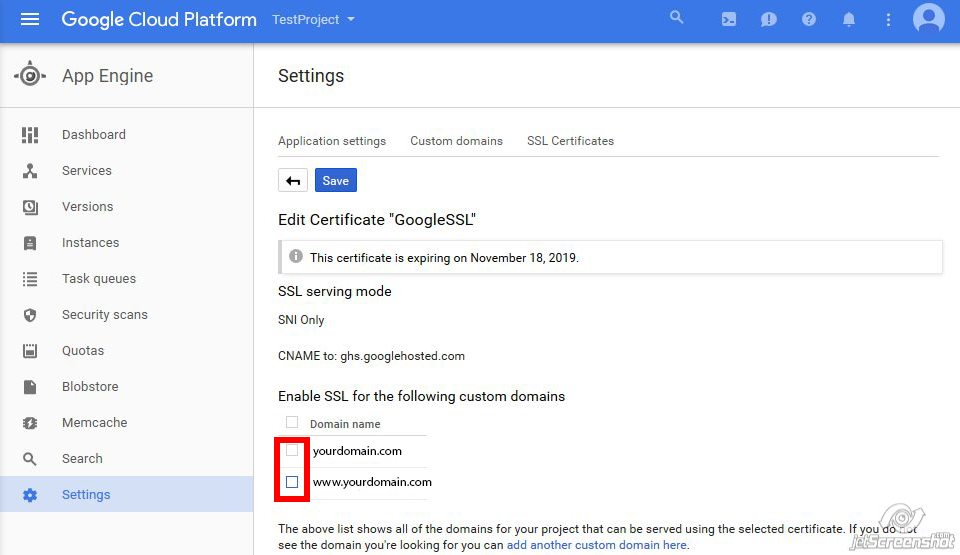
完成後,點擊頁面頂部的 '保存' 按鈕。
您可以使用在線工具檢查SSL安裝情況,鏈接為這裡。