
本教程將幫助您配置 Microsoft Outlook 2007-2010 以便使用您的電子郵件帳戶。
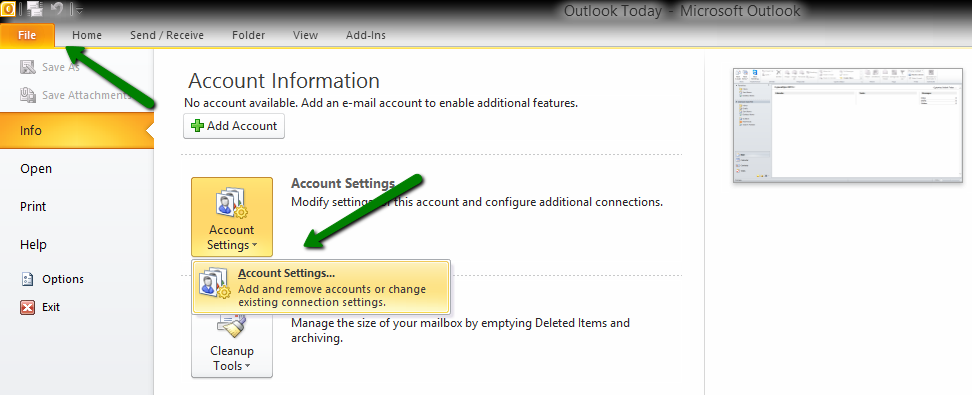
1. 要在 Outlook 中創建新帳戶,首先轉到 文件 > 帳戶設置 菜單:
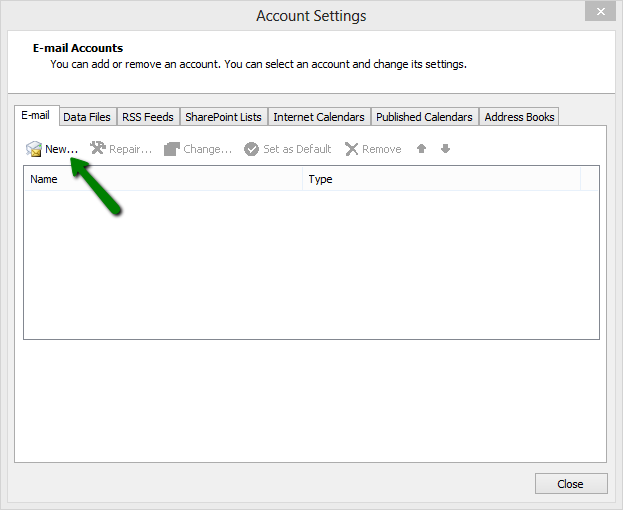
2. 在下一個窗口中單擊 新建:
3. 選擇 電子郵件帳戶 並輸入您的信息:
您的名字: 您在 Outlook 中的帳戶名稱
電子郵件地址: 完整電子郵件地址
密碼: 您的電子郵件帳戶密碼
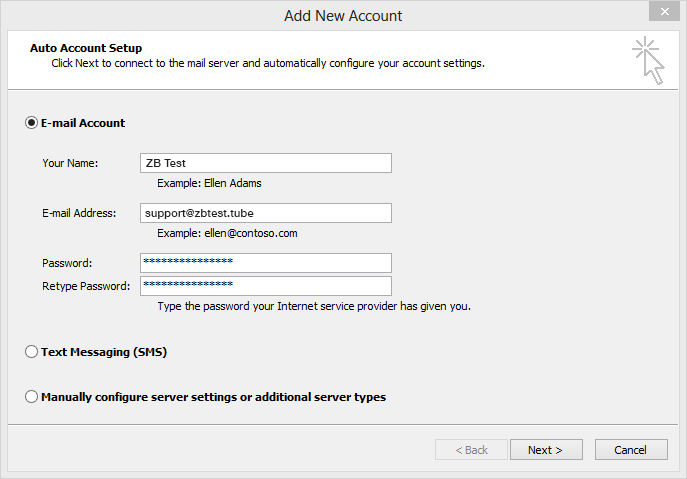
4. 當所有字段都填寫完成後,單擊 下一步。忽略任何出現的警告並繼續進行下一步。
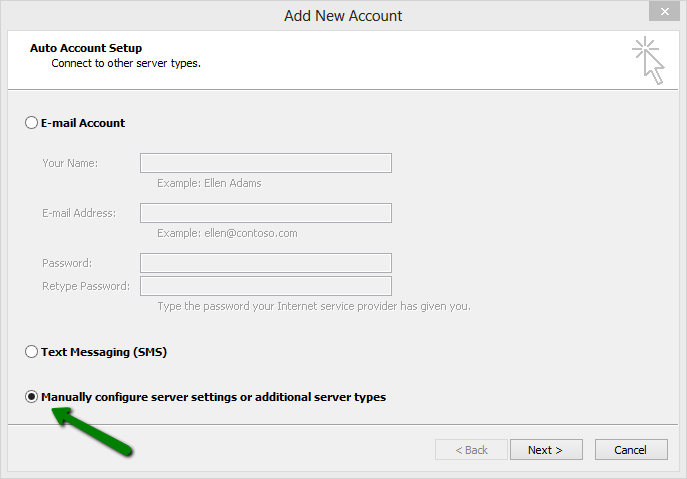
如果您無法繼續,您可能需要重複設置過程。您也可以嘗試手動設置帳戶。要手動設置您的電子郵件帳戶,請完成第 1 和第 2 步(上文所述),然後按照以下指示操作:
1. 選擇 手動配置伺服器設置或其他伺服器類型 選項,然後單擊 下一步:
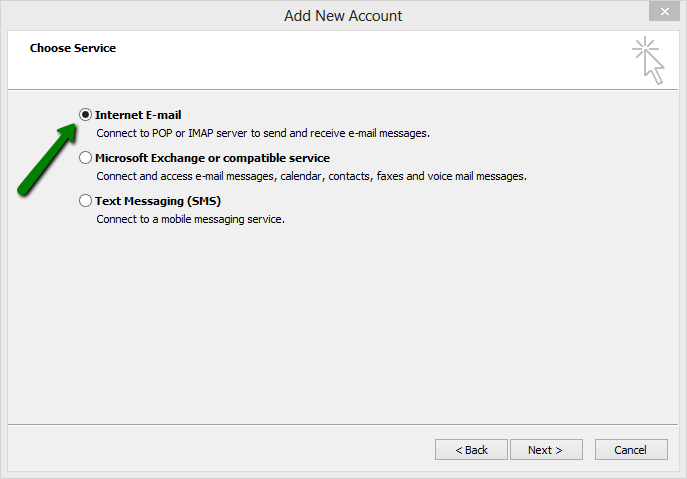
2. 選擇 互聯網電子郵件,然後單擊 下一步:
3. 輸入/選擇以下信息:
您的名字: 您在 Outlook 中的帳戶名稱
電子郵件地址: 完整電子郵件地址
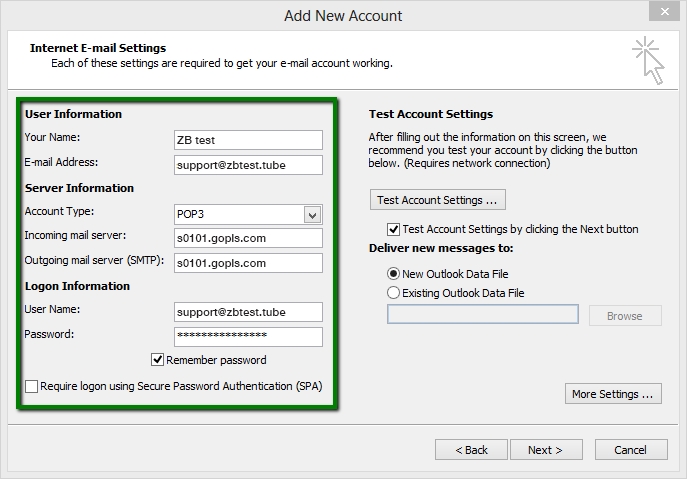
帳戶類型: 從下拉菜單中選擇 IMAP 或 POP3
進來的郵件伺服器: 您的帳戶所託管的伺服器
發出郵件伺服器: 您的帳戶所託管的伺服器
用戶名: 完整電子郵件地址
密碼: 此電子郵件帳戶的密碼
需要使用安全密碼身份驗證 (SPA) 登錄: 應取消勾選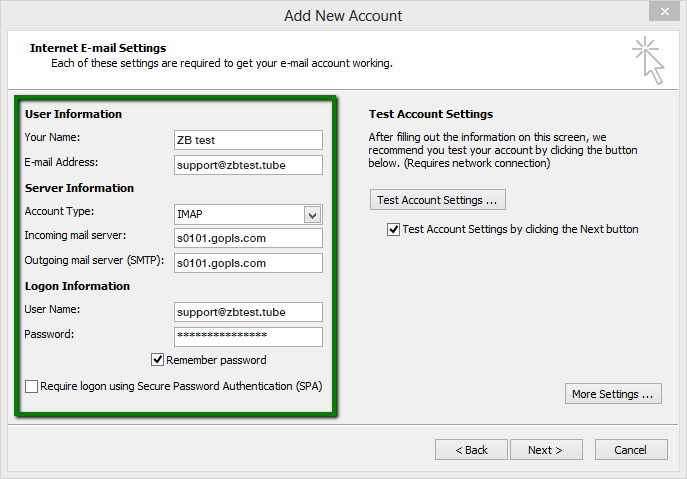
或
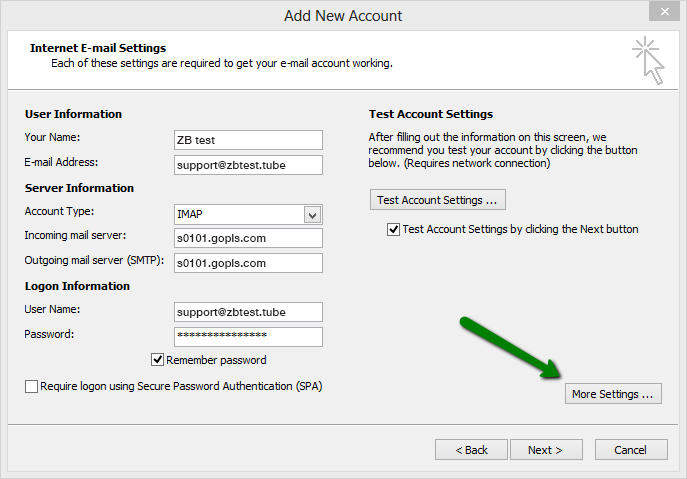
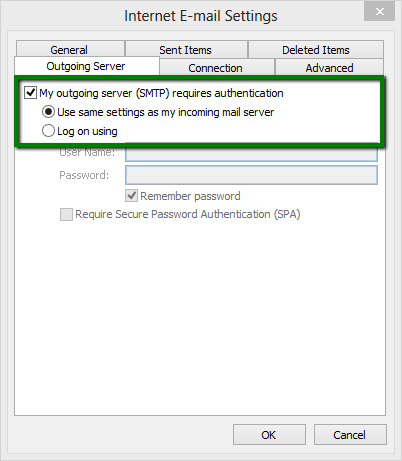
6. 單擊 更多設置:
7. 轉到 發出伺服器 標籤並勾選選項 我的發出伺服器 (SMTP) 需要身份驗證:
8. 現在轉到 進階 標籤並輸入以下端口設置:
進來的伺服器(如果您使用 IMAP): SSL 的端口為 993,TLS 的端口為 143
進來的伺服器(如果您使用 POP3): SSL 的端口為 995,TLS 的端口為 110
發出伺服器(SMTP): SSL 的端口為 465,TLS 的端口為 25/587

9. 單擊 確定 返回主窗口。
10. 單擊 測試帳戶設置 檢查所輸入的信息是否正確。如果正確,您會看到狀態為 已完成:
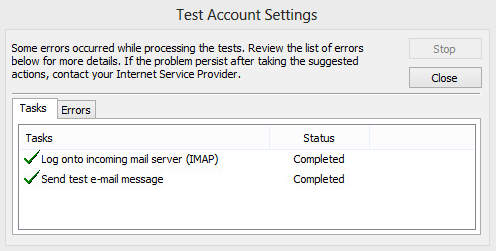
11. 如果測試成功,您現在可以單擊 關閉 返回前一窗口。然後單擊 下一步 以完成設置。
在 Microsoft Outlook 2007-2010 設定電子郵件帳戶
- 電郵服務
- 更新 2019年1月17日