
本文將描述在 Exchange 2013 中使用瀏覽器可訪問的工具生成 CSR 的步驟。
在此示例中,我們在名為 MAIL 的伺服器上為域 mail.zbtest.info、zbtest.info 和 autodiscover.zbtest.info 生成 CSR。
在設置 Exchange 伺服器時,您可以為大多數服務(如 OWA(Outlook Web Access)或 OAB(離線地址簿))指定相同的子域 'mail'。對於 Autodiscover 服務,通常使用子域 'autodiscover',而 Outlook Anywhere 通常可以通過子域 'oa' 訪問。
證書簽名請求在 Exchange 管理中心生成。
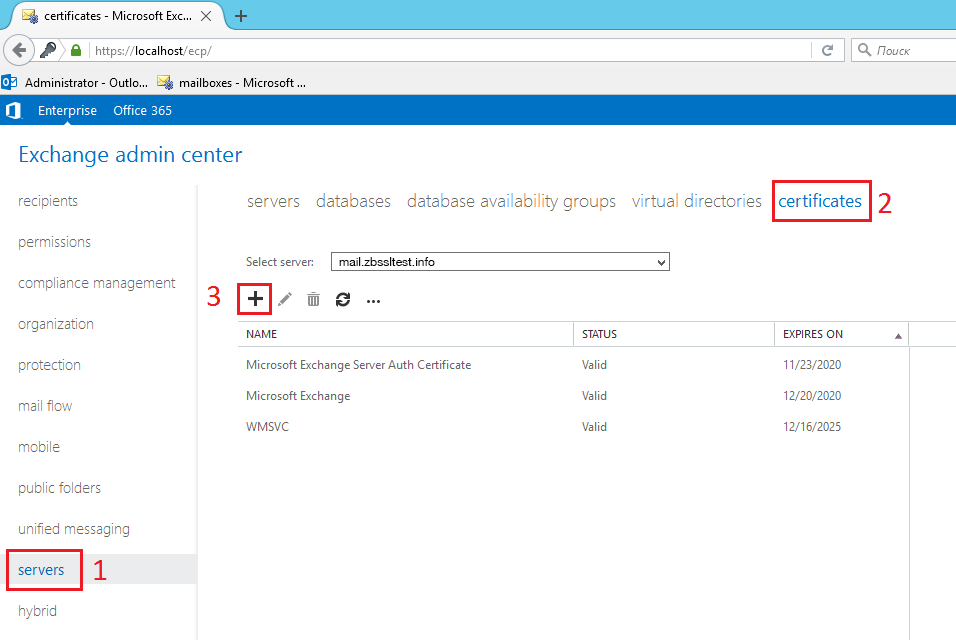
1) 首先,在網頁瀏覽器中打開 Exchange 管理中心(通常通過 https://localhost/ecp 完成),然後導航至 伺服器 > 證書。然後點擊 '+' 按鈕以打開 Exchange 證書向導。
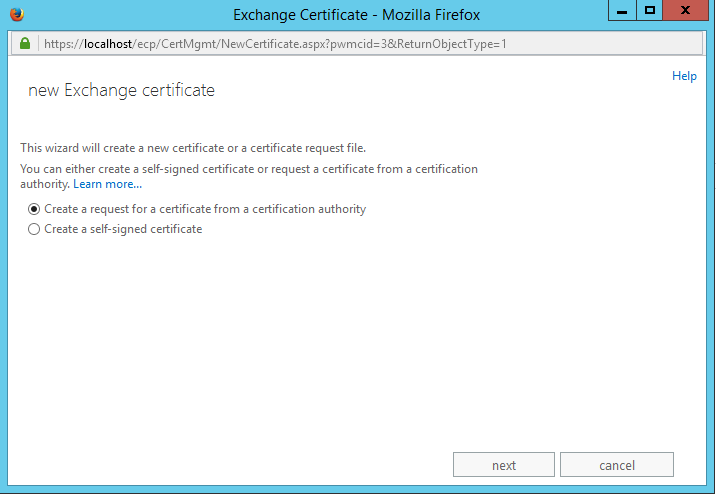
2) 選擇 '創建來自證書頒發機構的證書請求',然後點擊「下一步」。
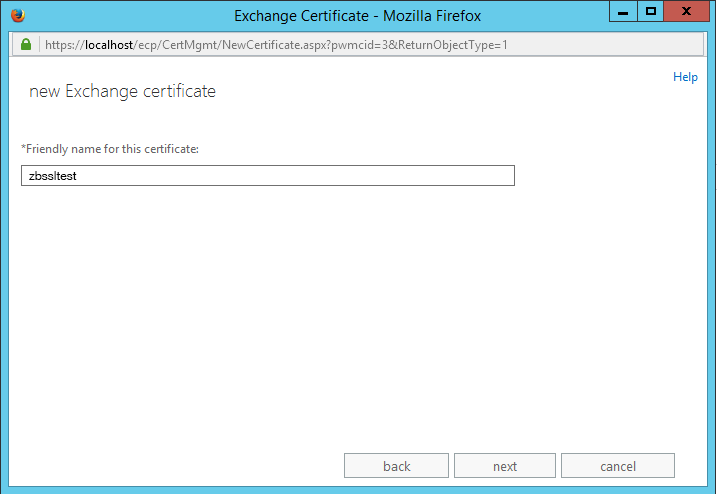
3) 給您的證書一個 友善名稱,然後點擊「下一步」以繼續。這個友善名稱是為了讓伺服器管理員以後識別證書,而不是域名本身。
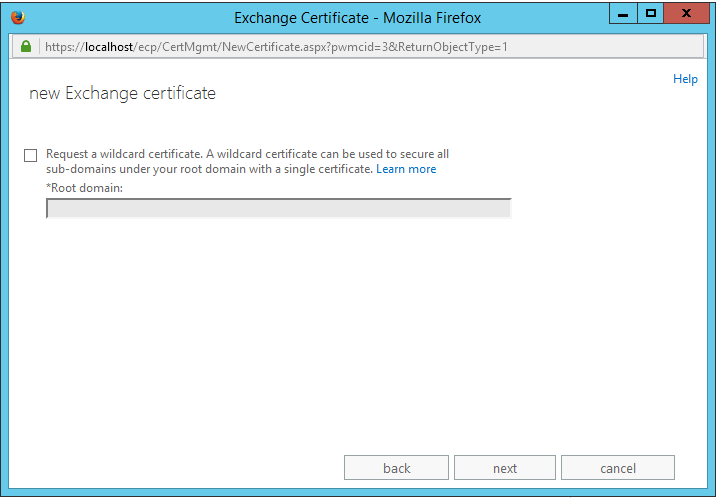
4) 在下一步中,您將有選擇為 通配符 領域創建 CSR 的選項。雖然通配符證書被 Exchange 2013 接受和支持,但不建議使用,因為它們可能不符合其他不支持的伺服器產品。如果您使用的是多域(也稱為其他名稱 - SAN 或 UCC)證書,可以通過點擊 下一步 跳過此步驟。
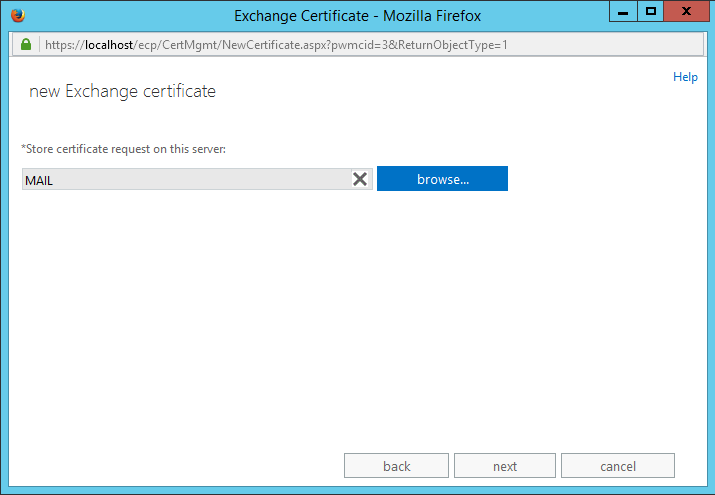
5) 點擊 瀏覽,選擇要在其上儲存待處理 CSR 的 Exchange 伺服器,然後點擊 下一步。
6) 從列表中選擇需要使用證書安全保護的 服務,使用 Ctrl+Click 選擇。對於通配符證書,應省略此步驟。
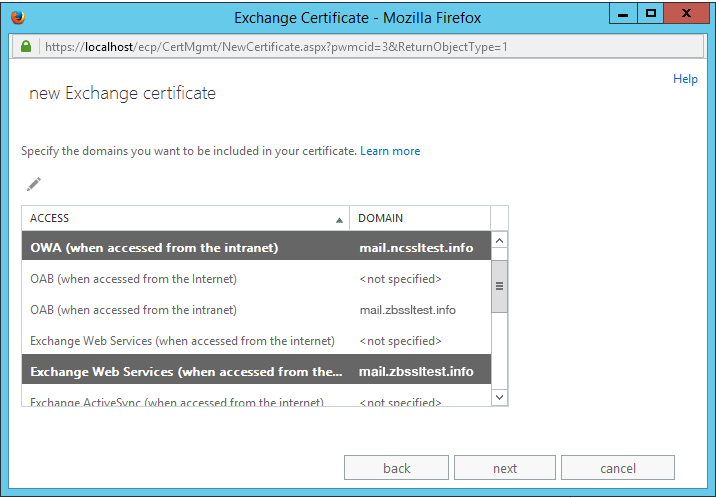
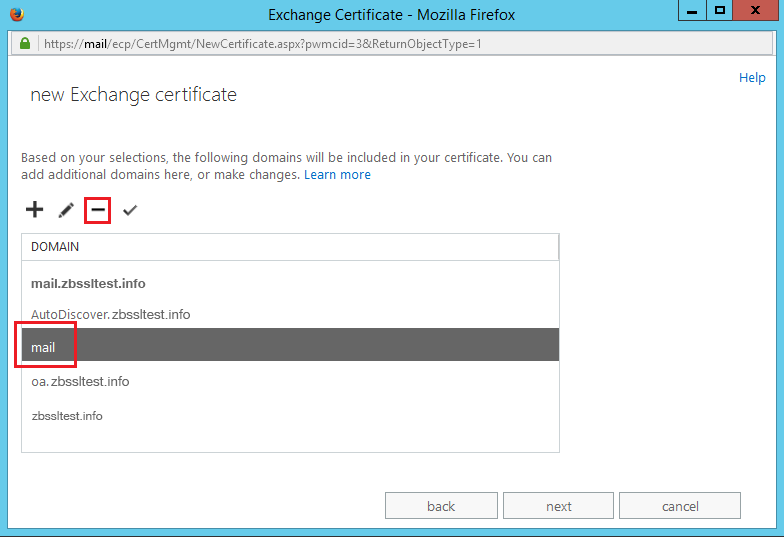
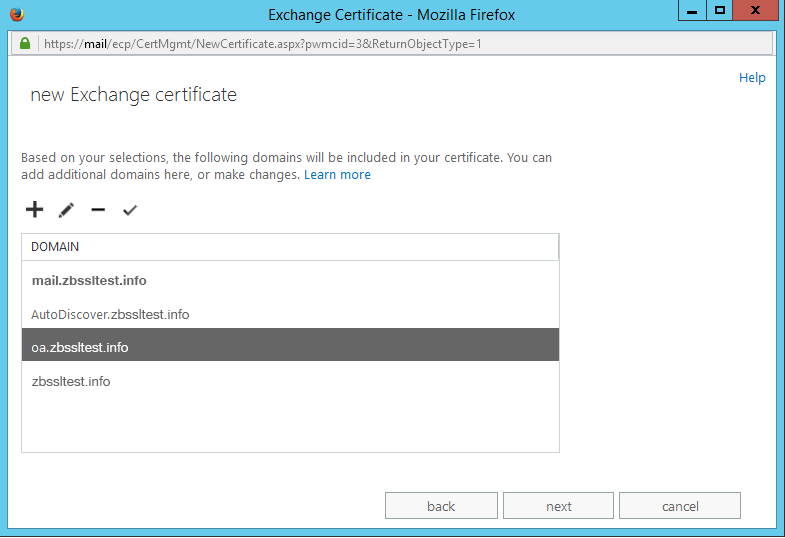
7) 在下一個屏幕上,您可以查看將包含在證書中的域/子域 列表。如果不同的服務使用相同的子域,則在列表中僅顯示一次。如果需要,可以使用 '+' 按鈕添加額外域名。
注意:伺服器內部名稱由伺服器添加到列表中。根據上一步的完成情況,還可能出現各種其他名稱。由於CA/Browser forum的限制,證書頒發機構不會為內部/本地域名簽發證書。使用 '-' 按鈕將內部域名從列表中刪除。
8) 在檢查和根據您的喜好編輯名稱列表後,點擊 下一步。
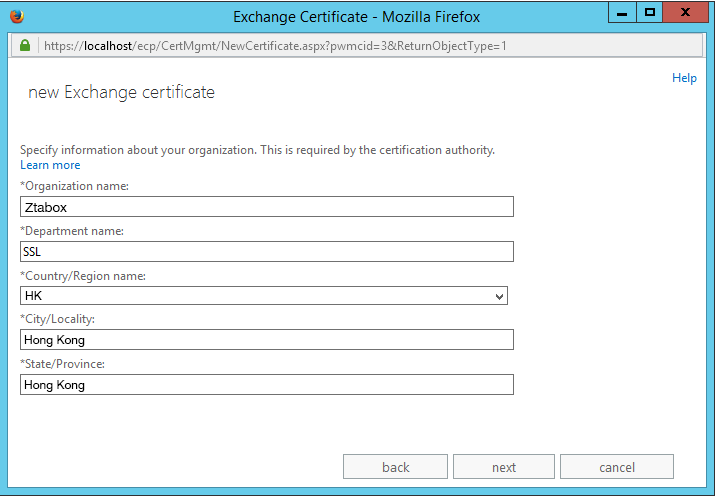
9) 在這一步中,您將填寫 組織 詳細信息。以下是這些字段的簡短描述:
- 組織名稱:您公司的名稱。如果證書不是用於公司或組織,您可以輸入 'NA'。在大多數情況下,域名驗證證書對於 Exchange 伺服器是足夠的,因此不會造成任何問題。
- 部門名稱:您組織內的部門。如果您的公司沒有部門,這裡也可以使用 'NA'。
- 國家/地區名稱:從下拉列表中選擇您的國家。此字段指的是您域名註冊/運營的國家。
- 城市/地區:您城市的全名。
- 州/省:您州或省的全名。如果您所在的國家沒有州或其他地區標識,您可以重新輸入城市名稱。
注意:所有字段應僅包含 字母數字 符號(A-Z, a-z, 0-9);不允許使用特殊字符('&'、'/'、'^'、'â' 等)。
10) 輸入 CSR 將被保存的計算機文件夾的 路徑。在這個例子中,文件將保存到 C:// 的 'certs' 文件夾。注意:目標文件夾應提前創建。系統提供將文件保存為 .req 擴展名的選項,但您只需要其文本,因此您可以自由使用 .txt 擴展名。
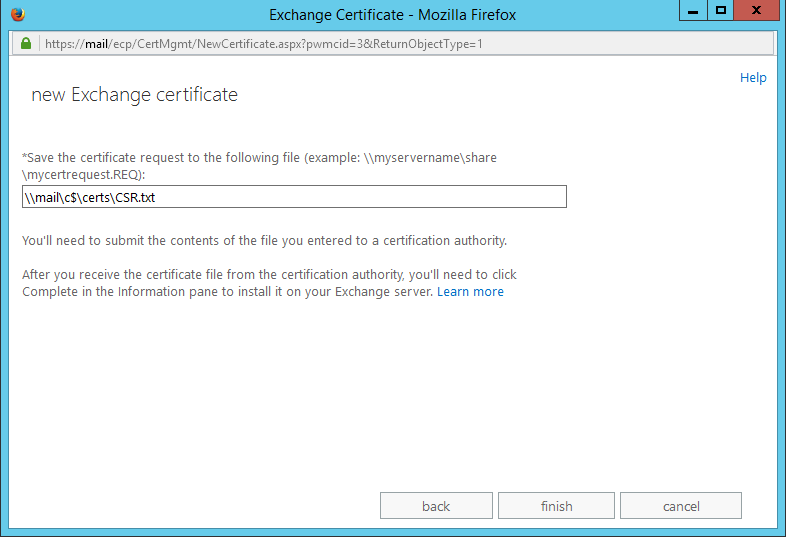
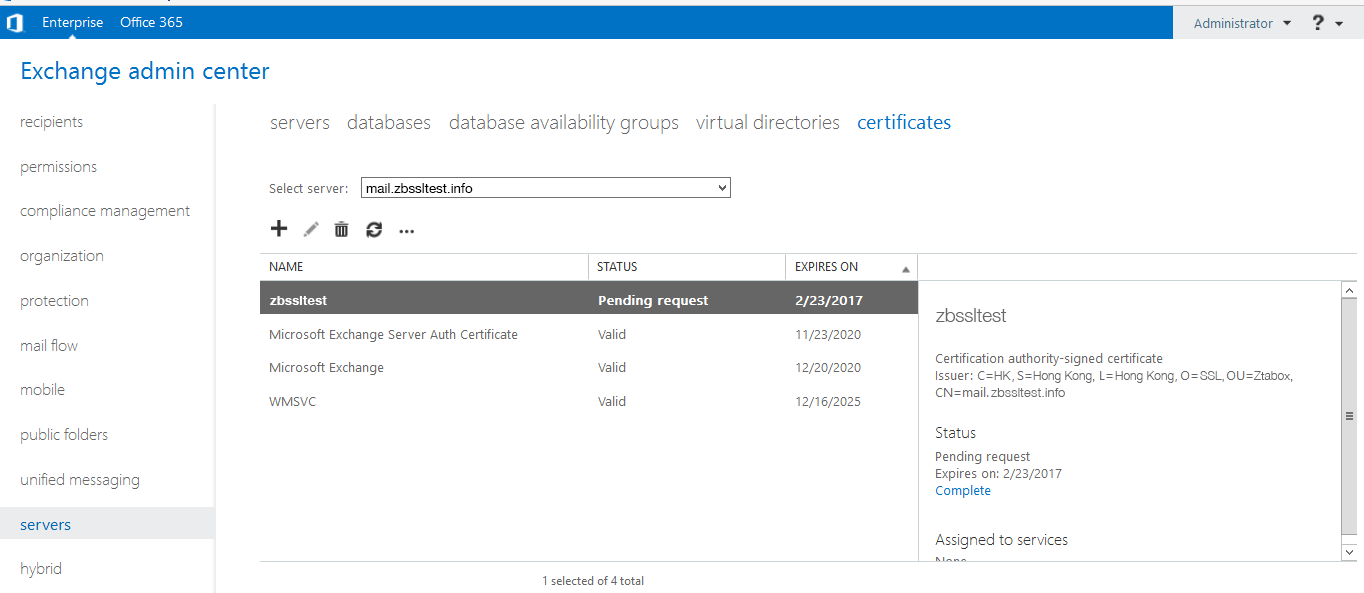
11) 點擊 完成 後,您將在證書菜單中看到您的 待處理 證書請求。
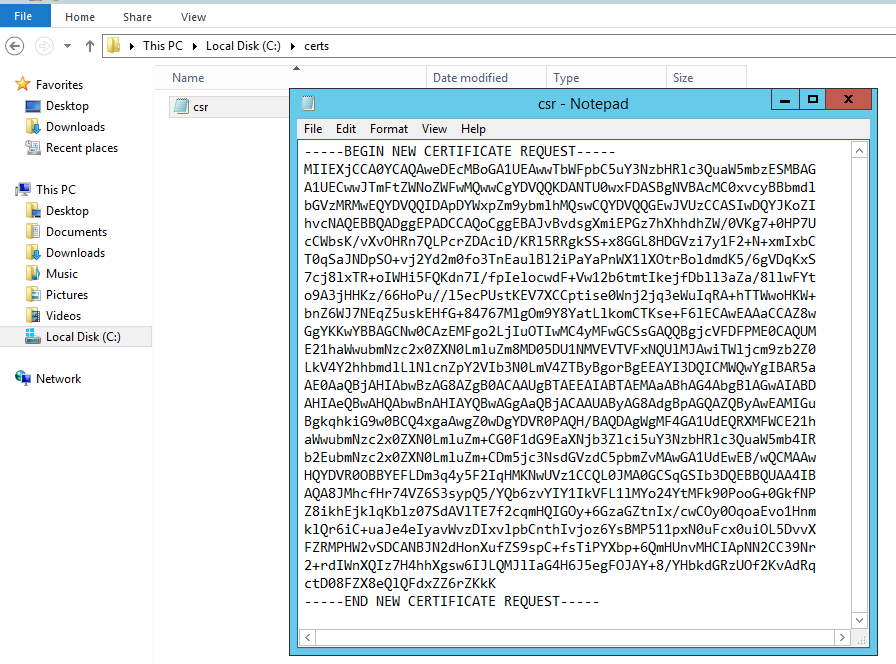
12) 然後可以在您的計算機上找到該文件,使用第 10 步中指定的路徑。請使用整個文本(包括 Begin 和 End 標頭)進行證書激活。
13) 在證書被證書頒發機構發放後,您可以使用本指南進行安裝。