
如今在同一台伺服器上托管多個網站使用相同的 IP 地址是一種普遍做法。在這種情況下,客戶端和伺服器都需要支持 伺服器名稱指示 (SNI) 技術,以請求並接收為該域名發出的匹配證書。SNI 依賴於客戶端在 SSL 握手過程中發送 ServerName 標頭,這意味著客戶端支持 SNI 是至關重要的。雖然大多數現代應用程序配置為支援 SNI,但支持較舊/傳統的客戶端將需要額外的配置。
本文將涵蓋如何在 Windows 伺服器上支持不兼容 SNI 的客戶端。
注意: 支持 SNI 的瀏覽器列表可以在 這裡找到。
SNI 支持自 Microsoft IIS 8.0 開始添加。要求伺服器名稱指示 是網站綁定中的選項,該選項允許將多個證書綁定到使用相同 IP 地址的不同網站:
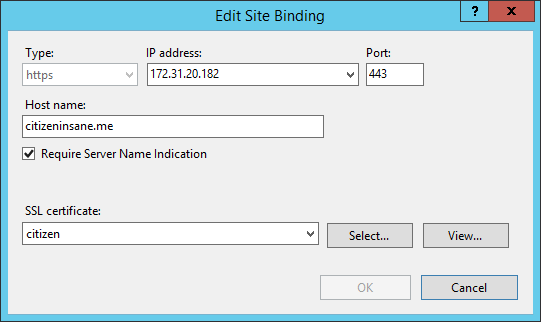
對於此類 SNI 綁定,伺服器將期望收到 ServerName 標頭。如果一個不支持 SNI 的客戶端嘗試進行 HTTPS 連接,伺服器將不會收到 ServerName 標頭,並且不會發送證書。這會導致 SSL 握手錯誤,因此無法建立 HTTPS 連接。
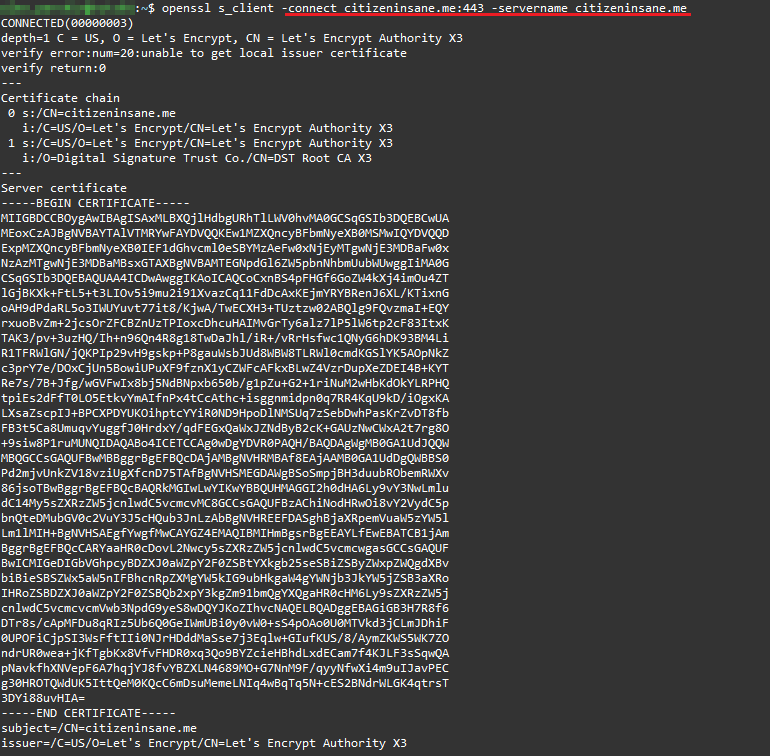
具有 SNI 的連接
以下是帶有 ServerName 標頭的 SSL 連接示例。伺服器檢查該標頭並發送正確的證書:
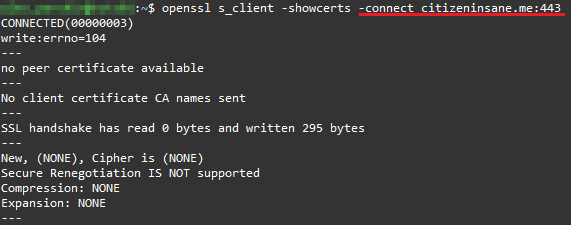
不具有 SNI 的連接
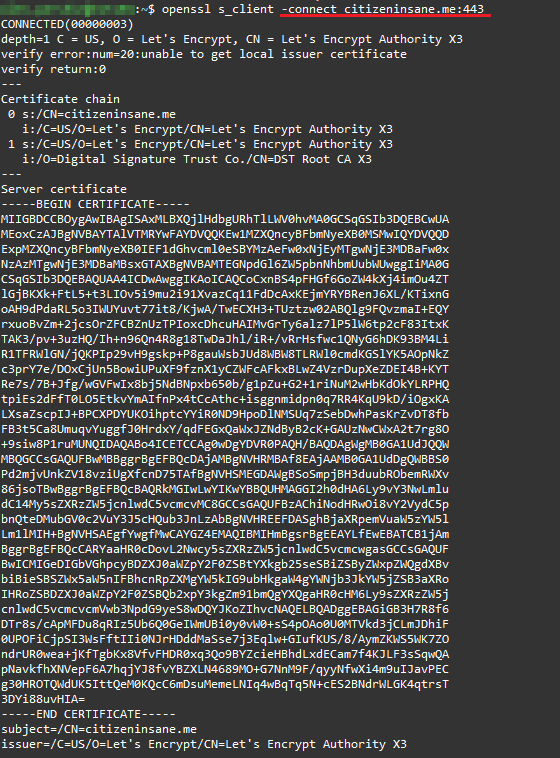
這裡是對同一伺服器進行 SSL 連接的示例,未包含 ServerName 標頭。請注意,伺服器未發送證書:
解決方案:可以創建對 0.0.0.0:443 的手動證書綁定,當客戶端未發送 ServerName 標頭時,該證書將用作 HTTPS 連接的後備證書。每個端口只能配置一個備用證書。
以下 PowerShell 命令用於創建此綁定:
netsh http add sslcert ipport=0.0.0.0:443 certhash=thumbprint appid='{5d89a20c-beab-4389-9447-324788eb944a}'
注意:運行此命令需要以管理員身份登錄。
確定證書指紋
檢查證書指紋有幾種方法:
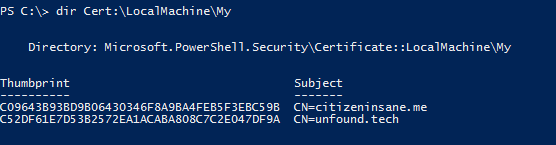
- 在 PowerShell 中檢查伺服器上安裝的證書
您可以使用以下命令檢查伺服器上安裝的證書: dir Cert:LocalMachineMy
示例:
- 在 PowerShell 中檢查現有綁定
- 在 MMC 中檢查證書屬性
- 在 decoder.link 解碼證書
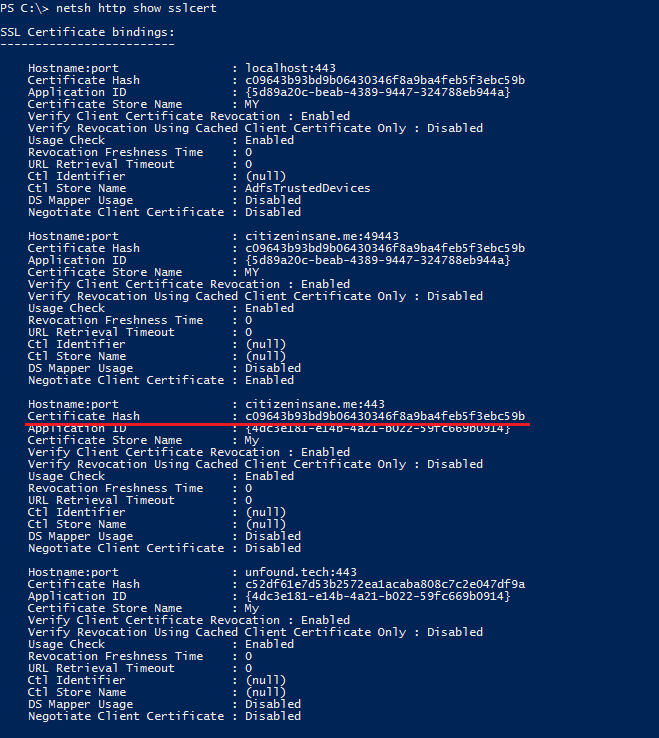
可以使用以下 PowerShell 命令檢查現有綁定: netsh http show sslcert
示例:
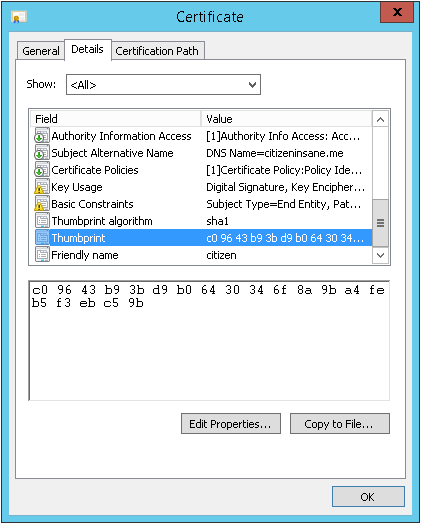
您可以使用 MMC 中的證書管理單元檢查證書屬性。在詳細信息選項卡中向下滾動可以找到指紋:
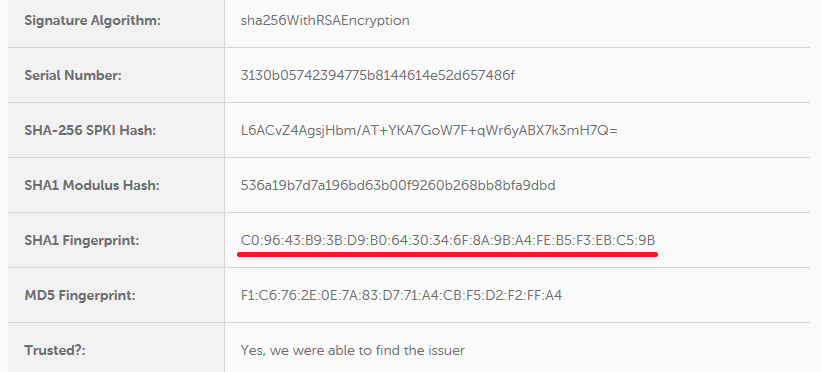
您可以在這裡檢查指紋: sslchecker
輸出將包含 SHA-1 指紋(指紋):
在 PowerShell 中運行命令
最後,該命令將類似於這樣:
netsh http add sslcert ipport=0.0.0.0:443 certhash=c09643b93bd9b06430346f8a9ba4feb5f3ebc59b appid='{5d89a20c-beab-4389-9447-324788eb944a}'
輸入後,伺服器將確認綁定已添加:

您可以通過檢查現有綁定來驗證綁定是否已添加: netsh http show sslcert

從現在起,當客戶端未指定 ServerName 時,將使用該證書:
幾點總結
- 如果在該 IP 地址上僅托管一個網站,則不必配置備用證書。相反,在創建綁定時,可以關閉 要求伺服器名稱指示 選項。
- 對於 IIS 8.0 之前的版本,僅能為 IP 地址創建綁定(每個 IP 地址一個綁定)。
- 如果需要為多個網站配置支持不支持 SNI 的客戶端,請考慮使用 多域名證書 作為後備。