
本文的目的是描述在 Synology NAS 伺服器上安裝 SSL 的過程並指出可能出現的問題。
Synology NAS 伺服器用戶的先決條件
- 首先,為了獲得受信任的證書,您需要擁有可以分配給 Synology DDNS 服務的域名*,因為我們網站上提供的 SSL 證書只能為完全合格域名(FQDN)簽發。
* 該 DDNS 服務對 Synology 用戶免費提供 這裡。
- 在進入下一步之前,請設置您的 DDNS 服務;
- 然後,應添加一個從您的域名或子域名(yourdomain.com)到 DDNS 服務(如 name.synology.me)的 CNAME DNS 轉發器。
以下是快速指南:
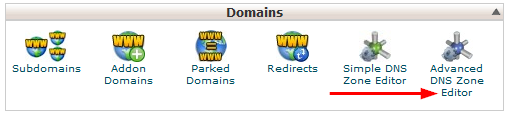
登錄到您的 cPanel,找到 'Domains' 方框並單擊 Advanced DNS Zone Editor。
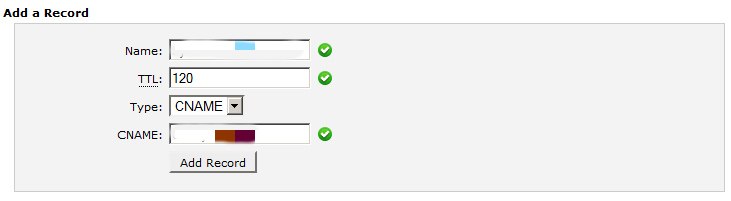
在 'Add a Record' 下,填寫每個框以輸入您的信息。 'Name' 欄位應有域名,而 'CNAME' 欄位應有 Synology NAS 主機名。然後單擊 'Add Record'。
- 請確保端口轉發已在您的路由器上配置。
SSL 安裝
注意: 本說明適用於 DSM5.0 及更高版本。只有 2009 年及之前的型號無法更新到最新的 DSM,因此建議過去 5 年內的型號升級到最新的 DSM。
CSR 代碼生成
在您的 Synology NAS 上安裝 SSL 證書之前,您需要生成證書簽名請求(CSR 代碼)並啟用證書。
將 SSL 證書導入 Synology:
一旦證書發放,您將收到來自證書授權機構的電子郵件,內含 SSL 文件。現在,您可以按照以下步驟將受信任的證書導入到 Synology 伺服器中。
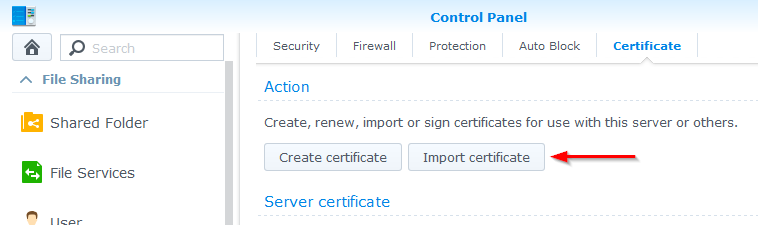
- 返回 Synology,導航至控制面板 > 安全性 > 證書,然後單擊 '導入證書'
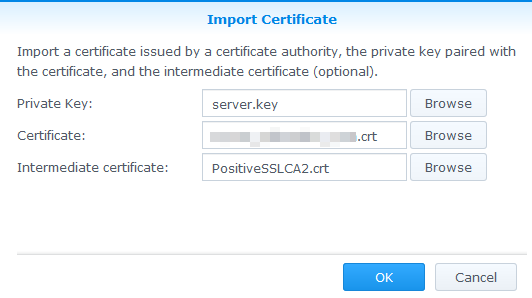
- 瀏覽並為每個字段導入以下文件:
(在本指南中,我們以 PositiveSSL 證書為例,對於其他簽發機構的不同 SSL 類型,安裝步驟相同)。
私鑰 - Server.key
證書 - domain_com.crt(在電子郵件中的 CA .zip 文件中收到)
中間證書 - 來自履行電子郵件的 CA Bundle 文件,PositiveSSLBundle 包含:
COMODO RSA Domain Validation Secure Server CA
COMODO RSA Certification Authority
AddTrust External CA Root然後單擊 '下一步'。
注意: 請使用解密的私鑰文件,如果您使用加密的文件,過程中可能會出現問題。推測這些問題可能出現在過時版本的 Synology 伺服器,因此 Synology 強烈建議使用最新版本。在撰寫本文時,最新版本為 DiskStation Manager 5.1(DSM 5.1)。
'無效的密碼類型' 錯誤
在安裝過程中還可能出現幾個問題,其中之一是 '無效的密碼類型' 錯誤。
如果私鑰文件的標頭不包含
(顯示為 -----BEGIN PRIVATE KEY 和 -----END PRIVATE KEY-----,而不是 -----BEGIN RSA PRIVATE KEY----- 和 -----END RSA PRIVATE KEY-----); 解決方案: 在文本編輯器中修改該文件。
'非法證書' 錯誤
在導入證書時,可能會出現 '非法證書' 錯誤。此問題可能有幾個原因:
- 通常 如果 .zip 壓縮檔在未解壓的情況下在文本編輯器中打開,並且在 -----BEGIN CERTIFICATE----- 標頭之前留下了文本,它就會彈出;解決方案: 解壓縮該檔案並獨立使用文本編輯器打開每個證書文件。
- Synology 網絡伺服器將重新啟動,這只需幾秒鐘。然後控制面板的 '證書' 頁面應如下所示:
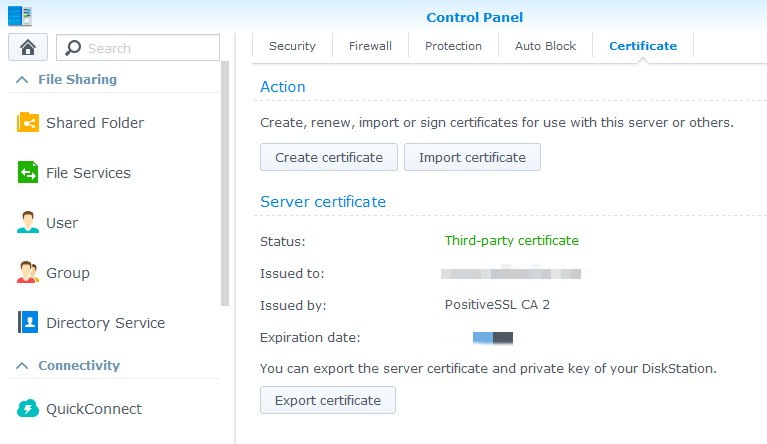
一旦證書安裝完成,所有應該都很清楚。然而,請確保您為該域創建了 CNAME 記錄,而不僅僅是從 name.synology.me 到的 URL 轉發,這樣證書的公共名稱不會與 URL 中的域名匹配。否則,如果您嘗試通過 https:// 連接到您的 Synology,您可能會在瀏覽器中收到 '常見名稱不匹配' 錯誤。
解決方案: 為該域創建 CNAME 記錄。
現在當證書安裝完成後,只需嘗試使用您的域名/子域名(例如: https://yourdomain.com )訪問您的 NAS - 這樣的話,地址欄中的鎖定圖標證明該連接現已由受信任的 SSL 保護。